
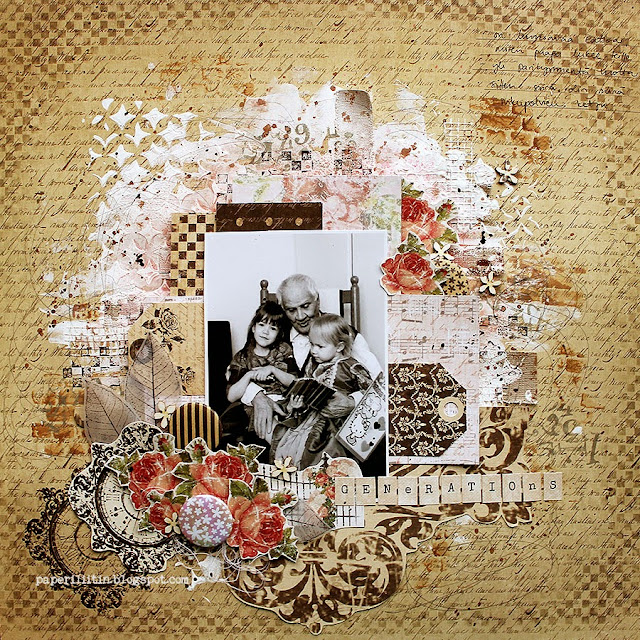
I love these picture of my daughters together with their great grandfather! Especially the pictures where he reads to them bring back memories, because the best part of my stay over at my grandparents was when he read to me. Uwielbiam fotografie, na której są moje córeczki z ich pradziadkiem! Moja ulubiona to ta, na której pradziadek czyta książkę; tak samo jak moi pradziadkowie czytali mi.

I used the Studio75 canvas and 3rd Eye stencil to make the background. I also added stamping with various mediums and used stamped items also as embellishments. The delicate roses seemed to be perfect embellishments for the darling photo and the vintage feel.
Do stworzenia tła użyłam tutaj płótna craftowego ze Studio 75 i maski 3rd Eye. Stemplowałam też różnymi mediami. Delikatne róże okazały się idealnym dodatkiem do ukochanej fotografii i klimatu vintage.
Do stworzenia tła użyłam tutaj płótna craftowego ze Studio 75 i maski 3rd Eye. Stemplowałam też różnymi mediami. Delikatne róże okazały się idealnym dodatkiem do ukochanej fotografii i klimatu vintage.
I created a step by step tutorial for the layout. You can see it here under.
Poniżej znajdziecie kurs krok-po-kroku jak stworzyłam tego skrapa.

Products used: Użyte produkty:


***

First I glued strips of canvas and some mesh tape to the background. Na początku przykleiłam do bazy trochę pasków płótna i taśmy.

On top I added gesso randomly and also through a stencil.
Następnie nałożyłam gesso, najpierw po prostu na tło, później przez maskę.

After the gesso had dried I started stamping. I stamped with three different medium and three different stamps.
Gdy gesso wyschło, zaczęłam stemplować. Stemplowałam trzema różnymi mediami, za pomocą trzech różnych stempli.

Then it was misting time! Added some brown and pink mist to the background.
Kolej na mgiełki! Dodałam trochę brązu i różu.

Now that the background was ready, I started layering the papers.
Kiedy tło było gotowe, ułożyłam warstwy papierów.

I added some verticals and horizontals to complete the design.
Dodałam paski poziome i pionowe.

Then I started adding the embellishments creating a cluster underneath the photo.
Ozdoby zgromadziłam wokół zdjęcia.

After this I only added the journaling, title and a few flicks of mist.
Na koniec dodałam journaling, tytuł i parę kleksów.
***

 Zapraszam też na
blog Studio 75 po jeszcze jeden inspirujący projekt z
wykorzystaniem naszych produktów! * ...and I want to invite You to the Studio75 blog where You
can find one more amazing project using our goodies!
Zapraszam też na
blog Studio 75 po jeszcze jeden inspirujący projekt z
wykorzystaniem naszych produktów! * ...and I want to invite You to the Studio75 blog where You
can find one more amazing project using our goodies!
Cudny klimat :) Dzięki wielkie za podzielenie się fotorelacją z powstawania LO :)
ReplyDeleteWspaniałe! I też mi się podoba, że mogę podejrzeć, jak LO zrobiłaś.
ReplyDeleteNiesamowite LO!!!! Fantastyczne!! I ta fotorelacja z powstawiania - dziękuję :)
ReplyDeleteJa baaardzo żałuję, ze moi Dziadkowie, nie mieli możliwości poznania moich dzieci :(
Rewelacyjne LO ... :)
ReplyDeleteAmazing work Riikka! Lovely photo! and thanks for your tutorial!
ReplyDeleteOd rana się przygladam temu LO i mam ochote zrobić, ale raczej pozostane przy kartce.
ReplyDelete